

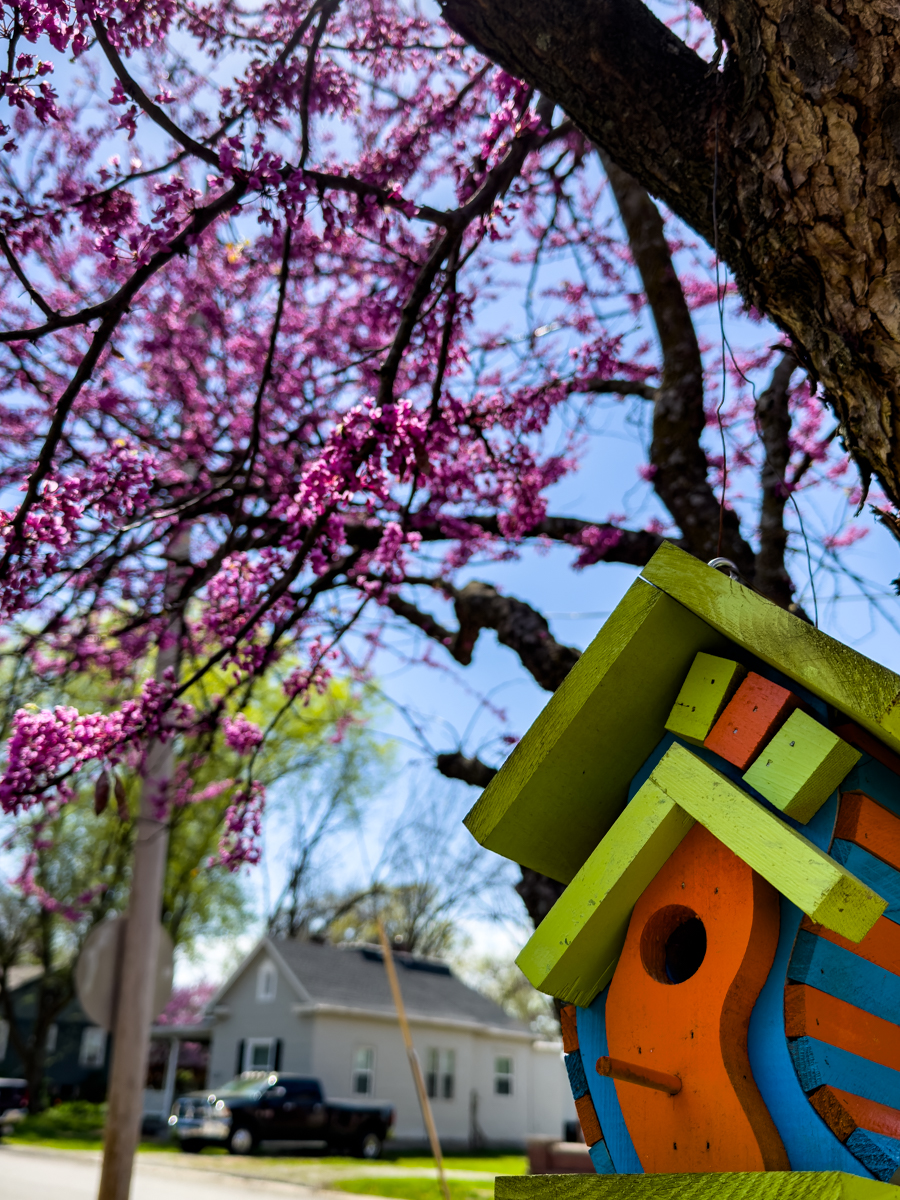
It’s been a crazy spring. Temps have been unseasonably low: read too many 30° or below nights. So much so my beloved Eastern Red Bud tree did not flower this year. I thought it might have finally given up the ghost.
So many other spring plants were equally confused and or killed off by frosts. My Red Bud went from bare, to green leaves—and even that seemed like an eternity to occur. There may have been a few blossoms, but I could count them on one hand.
I always define the beginning of spring by the welcomed & vivid pinkish/purple blossoms. It always brings such joy to see this mass of blooms against blue skies of spring. Not so much this year.
Spring came very late this year. Last year, by the beginning of May, I would have seeds planted in my seed trays and already on their way to sprouting. I didn’t plant jack this season. Seed trays are still stored and empty—how sad.
Because things were so late to happen, I decided to “try” to take back some of the weed overgrowth that has happened in all my gardens. I started at the front street facing garden. The plan was to shovel and sift/de-weed the entire bed. I had 4 rose plants I wanted to reposition in that bed, as well as cardboard and mulch the entire thing.
On a Sunday morning while I was out front working, a women driving past, stopped to compliment me on all the work I’ve done on my house and my gardens. How kind. As we spoke I told her how much work I had ahead of me to reclaim my gardens from the massive weed invasion. I had mentioned the possibility of buying a tiller to make the process easier — though the cost was rather prohibitive.
It was at this moment she told me I might look into and or join the Kansas City Community Gardens. She said they had a sliding scale membership based on income. She also said I could get all my gardens tilled for a whopping $8.00. What? I’m in!
Once she left I sat down and went to the KCCG website to investigate. Sure enough — tilling was one of the services they offered. With my income level my membership fee would be all of $2.00. With that membership I was entitled to 10 packages of free seeds, 10 pounds of organic fertilizer, and discounts on purchase of any starter plants/veggies.


I signed up online on Monday, and went to KCCG to pick up my membership card, seeds, and chicken poop, on Tuesday. The woman who manned the front table as you walk in, were so very sweet and helpful.
This — I guess — is the preamble to where this was all going: Raised Garden Beds, Trellises, and Irrigation.
The plot thickens …
Well. Maybe not so much thickens as is determined. I used the yellow shingled garage as the width: 20 ft. Aesthetically that would look better. And honey … if you think looks don’t matter — they sure do — on my projects. So twenty foot across, and twelve feet deep. I came to the depth more by lumber length, than anything else. Plus it gave me four feet of space to pick where the 4×8 beds would go, with plenty of room in front and behind.
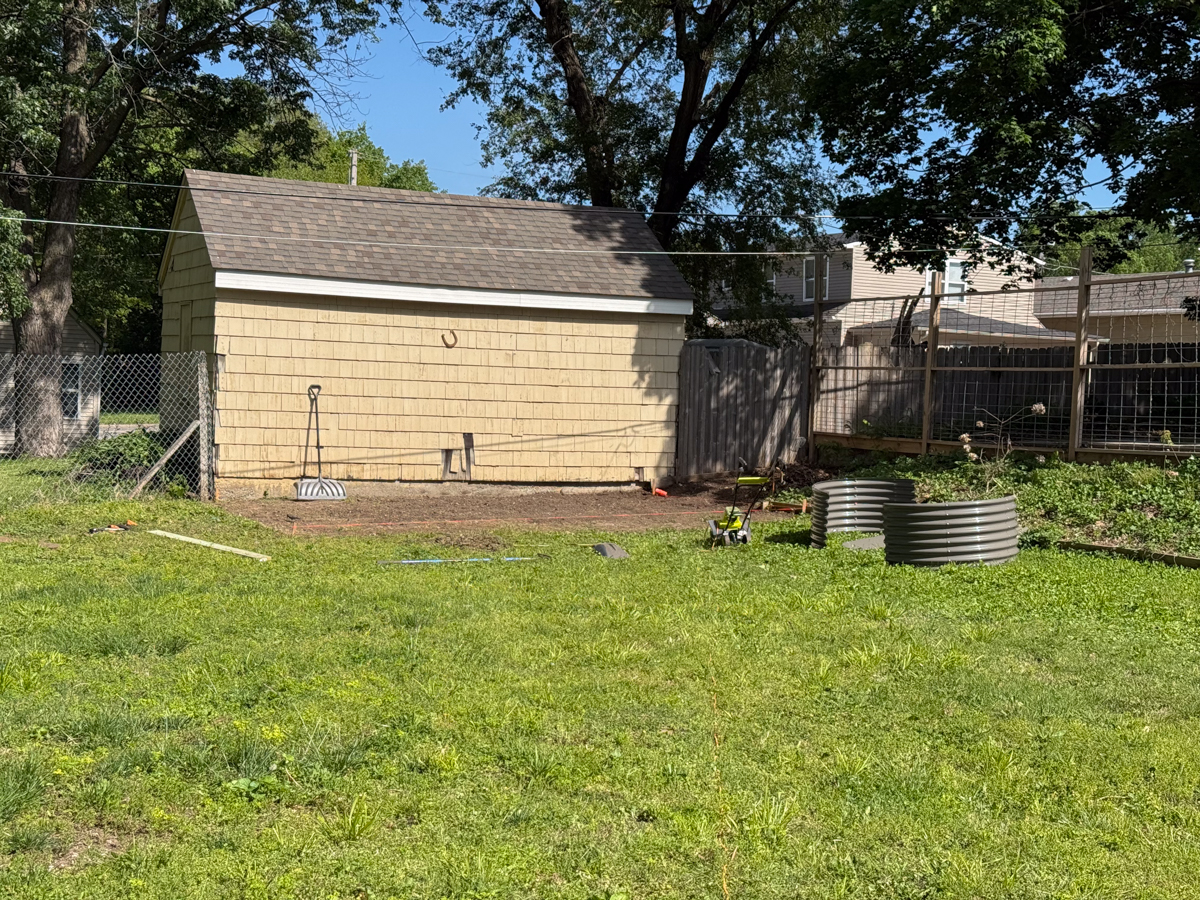
I staked out the perimeter and used nylon cord to mark the edges. It was more a visual for me as I tilled the uneven soil. And till I did. My GoJo electric tiller & my body got a workout. But it was the smart way to go about the task. Here in Missouri all the soil is clay. Luckily there was rain a few days before, so the ground was turned more easily. I tilled, raked, and tried to level as best I could. Mind you, the right side next to the hill was tilled the deepest & raked to the left side which was much lower.
Tilling and leveling done — for as much as I could.
Bring on the beds!
While tilling and leveling took several days, I had already ordered 3 raised beds from Glamazon. I’m happy they were on sale too! In typical Glamizon fashion: one arrived the Friday it was supposed to. The other two didn’t get delivered until Monday. On the positive side, it gave me a chance to determine if I wanted to keep them or not. I built the one, by myself within a few hours. Lots of bolts & wing nuts! But surprisingly sturdy. The metal was also a very heavy gauge, which was certainly a bonus.


I built all three beds. Next: an excursion to Home Depot for hardware cloth, and industrial strength weed barrier. I started laying down rows of weed barrier width-wise, tacking it with gardening staples. I started at the edge of the garage and worked out. Good thing I ordered more staples when I ordered the beds. The rows were overlapped by four inches. Once one layer was down, I started from the grass edge and laid down another overlapping layer. I know I did three layer this way. Might have done four. Old brain. Either way. No stinkin’ weeds are coming up through my gravel.
Now came the fun part. Moving all three beds into place. I measured and tried my best to make all with equidistant edges and spaces. Tried being the operative word here. I then outlined each bed inside and outside, to mark their place. I then moved all three beds out.
I laid down the hardware cloth. Now … if you’ve never had the pleasure of trying to roll out and flatten a fifty foot roll of hardware cloth, you are certainly missing — nothing. Such fun! But all part of the price of admission. The cloth was 4ft x 25ft. I had to cut three 4 x 8 pieces. After cutting, each piece was stapled down within the outlines I had created. Nice and neat! If I do say so myself. (Just an FYI here: The hardware cloth is to try to keep voles, moles, woodchucks, et. al., from burrowing under the bed and eating root vegetables or pulling down whole plants from the roots down. I’ve seen YouTube videos — it must be realz!) Then it was time to lift and move all three beds back into place.
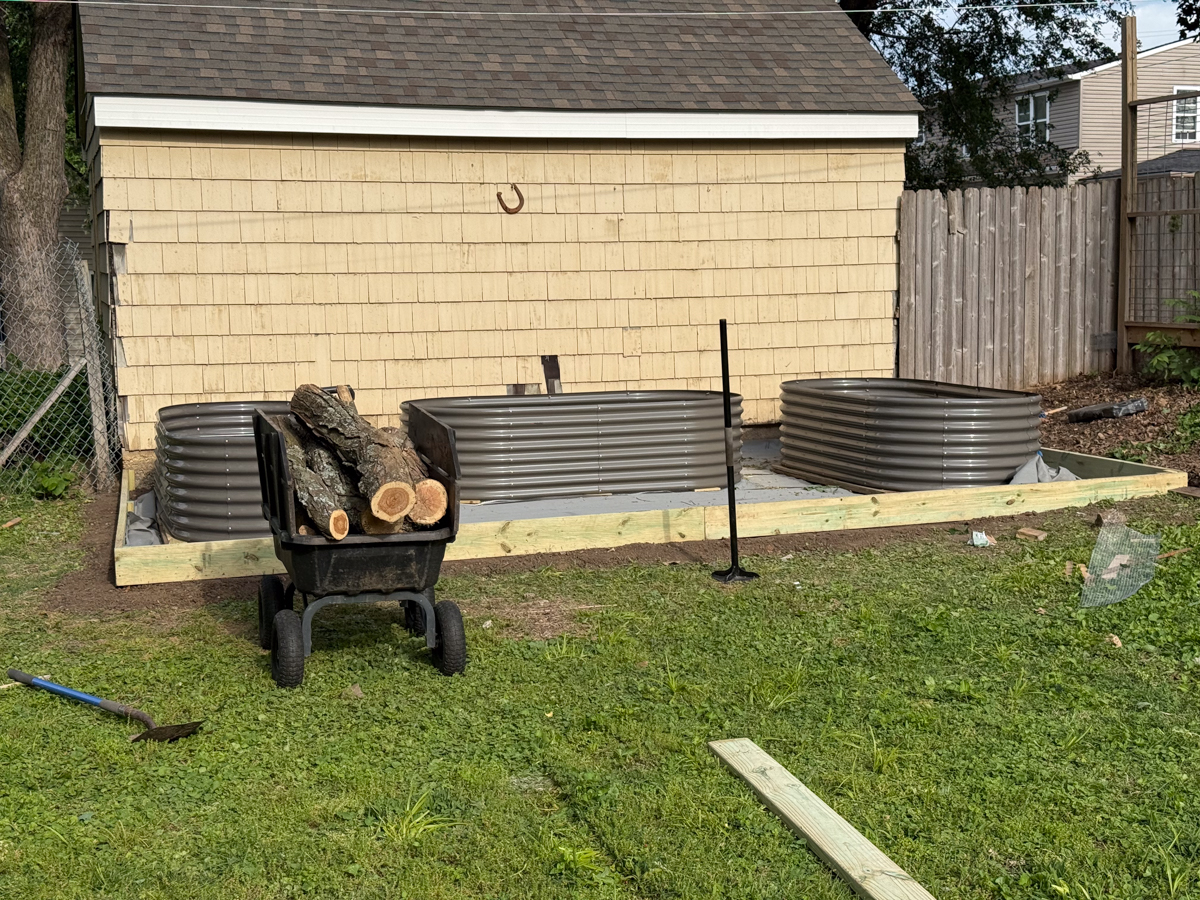
Now came time to try to level the beds. I did as much as I could leveling the ground. Things were still a little off. I used wood shims where needed, to do the leveling: side to side, front to back. Once leveled I used rolls of four inch garden borders I had, that had been retired. A little Joe recycling there. I used the border to block the spaces created by the wood shims raising the bed above ground level. I’d cut a piece of border to order, while inside the bed, and staple it in place. I also drilled holes into the wood shims, so I could drive staples through the wood to hold it in place. This way, none of it was going anywhere, especially once filled with dirt!
I was fortunate in my excursions between Lowe’s at home to find an empty lot that had been cleared out & trees cut down. There were piles of logs, which on multiple times, I stopped and loaded the back of my Soul with as much as I could stuff in there. Those logs, branches, and other mulchables were used to fill up 6 inches or more of the 2 foot height of the raised bed. This way I didn’t have to fill 4 x 8 x 2′ raised beds with soil. Three cubic yards was enough to buy. The things you’ll learn on the Interwebs.
Sticks and stones …
Not so much sticks as 2x8s and three yards of one inch gravel. I bought pressure treated wood: 2 – 12 ft 2 x 8s & 2 – 10 ft 2 x 8 x 10s. This would be the perimeter. Also bought 2 x 4 x 8s that would be cut down and attached to the two by eights which were then cemented into the ground. That was the easy part!


Here comes the fun part. Not! Three cubic yards of 1 inch gravel to be spread out 3-4 inches deep. This was the next thing that needed to happen. Using my Gorilla Cart, shovel, and me, I proceeded to take that 3 cubic yards and move it cart by cart to fill in that entire raised bed area. Now I must say. this was exhausting work, compounded by my chronic fatigue and being severely out of shape. So I shovel shovel shoveled into the cart for as long as I could tolerate. Then I’d sit down for three minutes or more regain my composure, and go back at it until the cart was full. On the other end I could at least dump the entire cart and then have to shovel and rake it to even it out. Needless to say this took a few days of back breaking work to complete. That was just the gravel.
For all the back, breaking work, it was coming together very nicely.
Digging in the Dirt
And for the next attraction: three cubic yards of raised garden bed mix from Missouri Organic Recycling. Now that all the gravel was down and everything was looking so pretty, it was time to fill those beds up, so I can get to growing stuff.
I did with the dirt what I did with the gravel: shovel shovel shovel, rest, walk the Gorilla Cart back to a bed, and shovel shovel shovel fill it up. In between filling the cart, walking the cart and emptying the cart the rest periods in between took place in the front of the house, sitting on top of three bags of mulch in the shade, and in the back of the house, one of My Mom’s chairs that I brought out into the yard specifically for this purpose.


Once I filled up the first bed, I had a brainstorm: create some kind of steps so that I could pull the card up over the top lip of the bed and dump one whole cart into the bed. Not rocket science, but more a MacGyver move (not that I ever saw the show) I used the seedling trays that I had built over the years here as steps, to make dumping the cart easier. Easier? Try lifting a full cart of dirt up the 8 inches onto the gravel, then move it to the steps, which weren’t all that sturdy. Never mind, I’m lifting this cart from the back edge of the cart, with my back facing the raised bed. Once I got it up the steps I had to gingerly get off the steps then chock the wheel with a 2×4, so I wouldn’t roll down while I dumped the dirt out. The things will do for gardening and or growing vegetables.
Continue this for the last two raised beds and I’m done. At least with that part of it.
Trying to Trellis
I knew I was going to try to grow a few climbing veggies, like cucumbers, and zucchini. Add to that nasturtiums, a climbing companion plant that helps keep pests away from the cucumbers and zucchini. So. Back to the Interwebs.
I searched and searched and found multiple different ways to build multiple different trellises. I actually have the trellis website or video on one page. Put that page on a separate screen, then on another screen, go to Home Depot and price out the cost of said trellis. Of course, I went to Glamazon and looked there. After all of that research and pricing out, I found a cheaper trellis on Glamazon and bought three. In true Glamazon style: only one trellis showed up, and the other two got lost. Yippee!
I built the trellis that did come and replaced the cheap nylon netting that was included with vinyl coated fencing for the plants to climb up. Of course it had to be black, to match the trellis. Of course! Once that was all done, one of my neighbors helped me lift it up into the bed and get it settled. I was very skeptical about the trellis. It was kind of flimsy. And I’m sure that a good gust of Missouri wind might actually topple it. Plus seeing how the other two trellises didn’t show up, I called Glamazon ask them to cancel those two, get a refund, and I was going to return the trellis I did get. And that was the end of that idea. I broke down the Glamazon trellis and returned it. Buh-bye!


Now I had to decide on how to go about making my own trellis. I found a “how to” on building conduit trellises on YouTube. Back to the Home Depot webpage, priced out the conduit and decided that was the way to go — more aesthetically than financially. The YouTube video that I used as reference was from a company called Maker Pipe. They’ve done an incredible series of videos on making trellises, storage racks, roof racks, using all the conduit hardware they manufacture and sell. So of course I bought all my conduit fittings from Maker Pipe. Any other conduit clamps, bolts, and nuts I bought at Home Depot.
Let the pipe cutting and fitting begin.
One of the other advantages of making my trellis from three-quarter inch conduit was that I could use a ton of the cattle fence panels I had purchased years ago, and had left over from that fencing project. Plus, the cattle fence would add more strength, and stability to the trellis. And quite frankly, I like the industrial look against the gray raised beds. They also kind of look like baseball cages, or football goals, yeah, right. I have two finished within the past two days but today we’re in the 90s so I’m inside in air-conditioning. I’m no fool. I’ll be up and out there at 6:30 AM tomorrow for sure to finish the last one. After that … onto the irrigation system. Yeah I’m crazy like that.
Grids & Grins
This has been one looooong strange trip. But the beginning is getting closer—of planting veggies—that is. Today, Thursday June 18th, was putting together the Garden In Minutes Garden Grid system for all three beds. Of course I did tons of research before laying down the dollars for this. They got amazing ratings and lots of praise. Plus it seemed pretty simple. They also made a version for round ended beds like I bought. Plus they had custom connectors for the height of your bed. Double bonus points!
The first grid took a little time putting together. You have to do a bit of slip tab A into slot B to put the sections together. The plastic tubing is flexible, but takes a lot of strength to twist them together. After the first one, I got the brilliant idea to lubricate the inside wall of the tubing with a dab of coconut oil on a Q-tip. This boy is nothing if not resourceful. Those connectors slipped in seconds. The first grid took me 30 minutes, The last two, using the coconut oil took tops 5 minutes each. My arms and shoulders thanked me for that idea & execution.
Another cool thing about this grid system: there is a T with male and female connectors on each end. This way I can connect all 3 grids with short lengths of garden hose. Of course I ordered two 10ft 3/4 inch stainless steel hoses from Glamazon & they should be here shortly. Once connected all I need is one main feed hose and all three grids can be used at once. And with each grid having its own shut-off valve the amount of water & pressure can be adjusted for each bed. Pretty damn awesome.
Now I’ll have to decide if I want to trench and lay pipe from the spigot on the side of the house to the back beds—80-ish feet. This way I don’t have to keep running a hose back there every time I want to water. I’m also thinking I can add a WiFi watering timer too, this way I can set up a schedule to water all three beds right from an app in mu iPhone. Plus these timers can cancel or alter waterings if it’s raining. Pretty damn smart!


So all in all once the hoses are connect — construction & setup is D.O.N.E.!
Only thing left is to plant some veggies & companion plants. Yeah. All of this for that. Hmm … I wonder how many decades it will take to get a return on my investment? Probably not in my lifetime … but still well worth it to grow fresh veggies. Aaaaaaaaaaawesome!


Leave a Reply