

It’s been a hellacious thirteen days since November fifth. My emotions have been strapped into what feels like a plummeting rollercoaster—just holding on for dear life!. I have been keeping myself busy trying not to think about the outcome, nor project (too much) about what might transpire in the next four years.
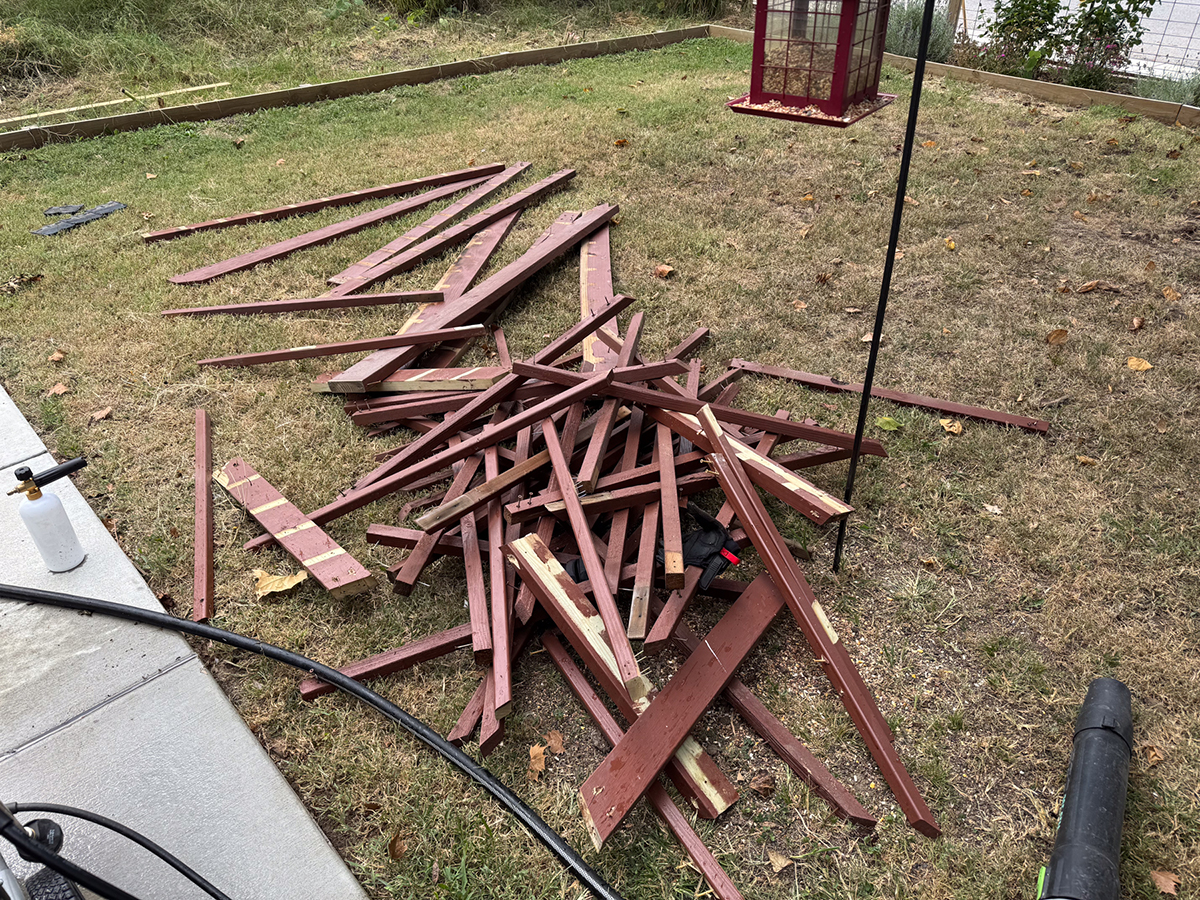
I worked on updating/transforming my front porch from its ancient redwood stainedness, to its current white and blue coolness. The end result I am pretty damn happy with! From the cast off wood remnants I decided to use the multitude of pickets as the materials to create new birdhouses.

The first task — since I didn’t have a wood planer — was to reface the four sides of each picket using my table saw. I set the saw to take off the least amount of each painted face; enough to remove the paint and create a smooth clean wood face on all four sides. When I was done each picket’s width and height were square. Then I set up the saw and cut one picket down the center of its length to create two half inch thick boards. I did this for the forty or so pickets that were salvageable.
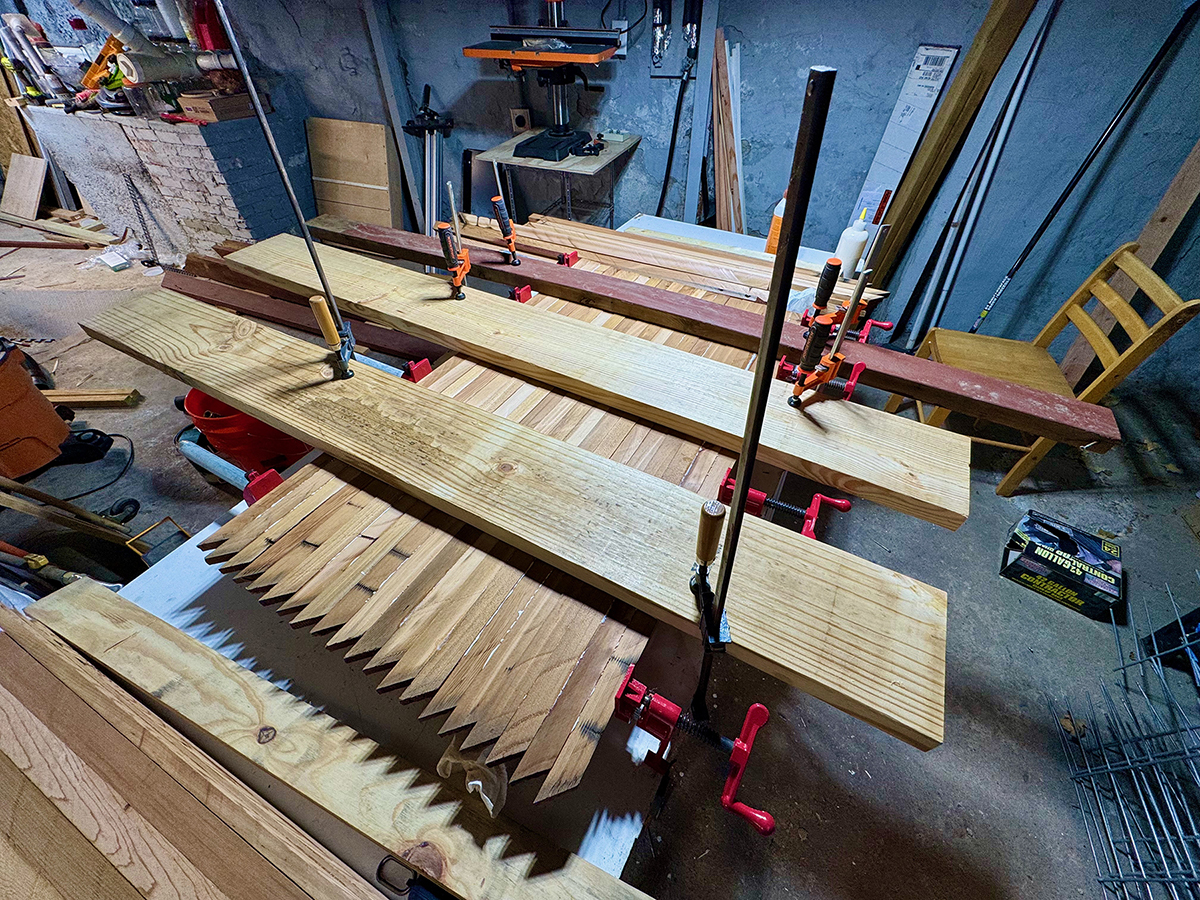
Once that was done it was time to glue the boards together. I took four strips each to create one usable board. Each glue-up produced five usable boards. The glue-up was a bit of a production. But I like repetition. I’ve used in my art, and it also happens in production. Repetative tasks calm me. They do tend to make me zone out. All I have to do is focus on the task at hand — execute and repeat. I also used two 2″ x 10″, and one 2″ x 4″ board to clamp from the top to keep pressure uniform and not have the smaller boards buckle up from the side pressure. This allowed me to apply more side pressure. I’ve been gluing boards for a few days.
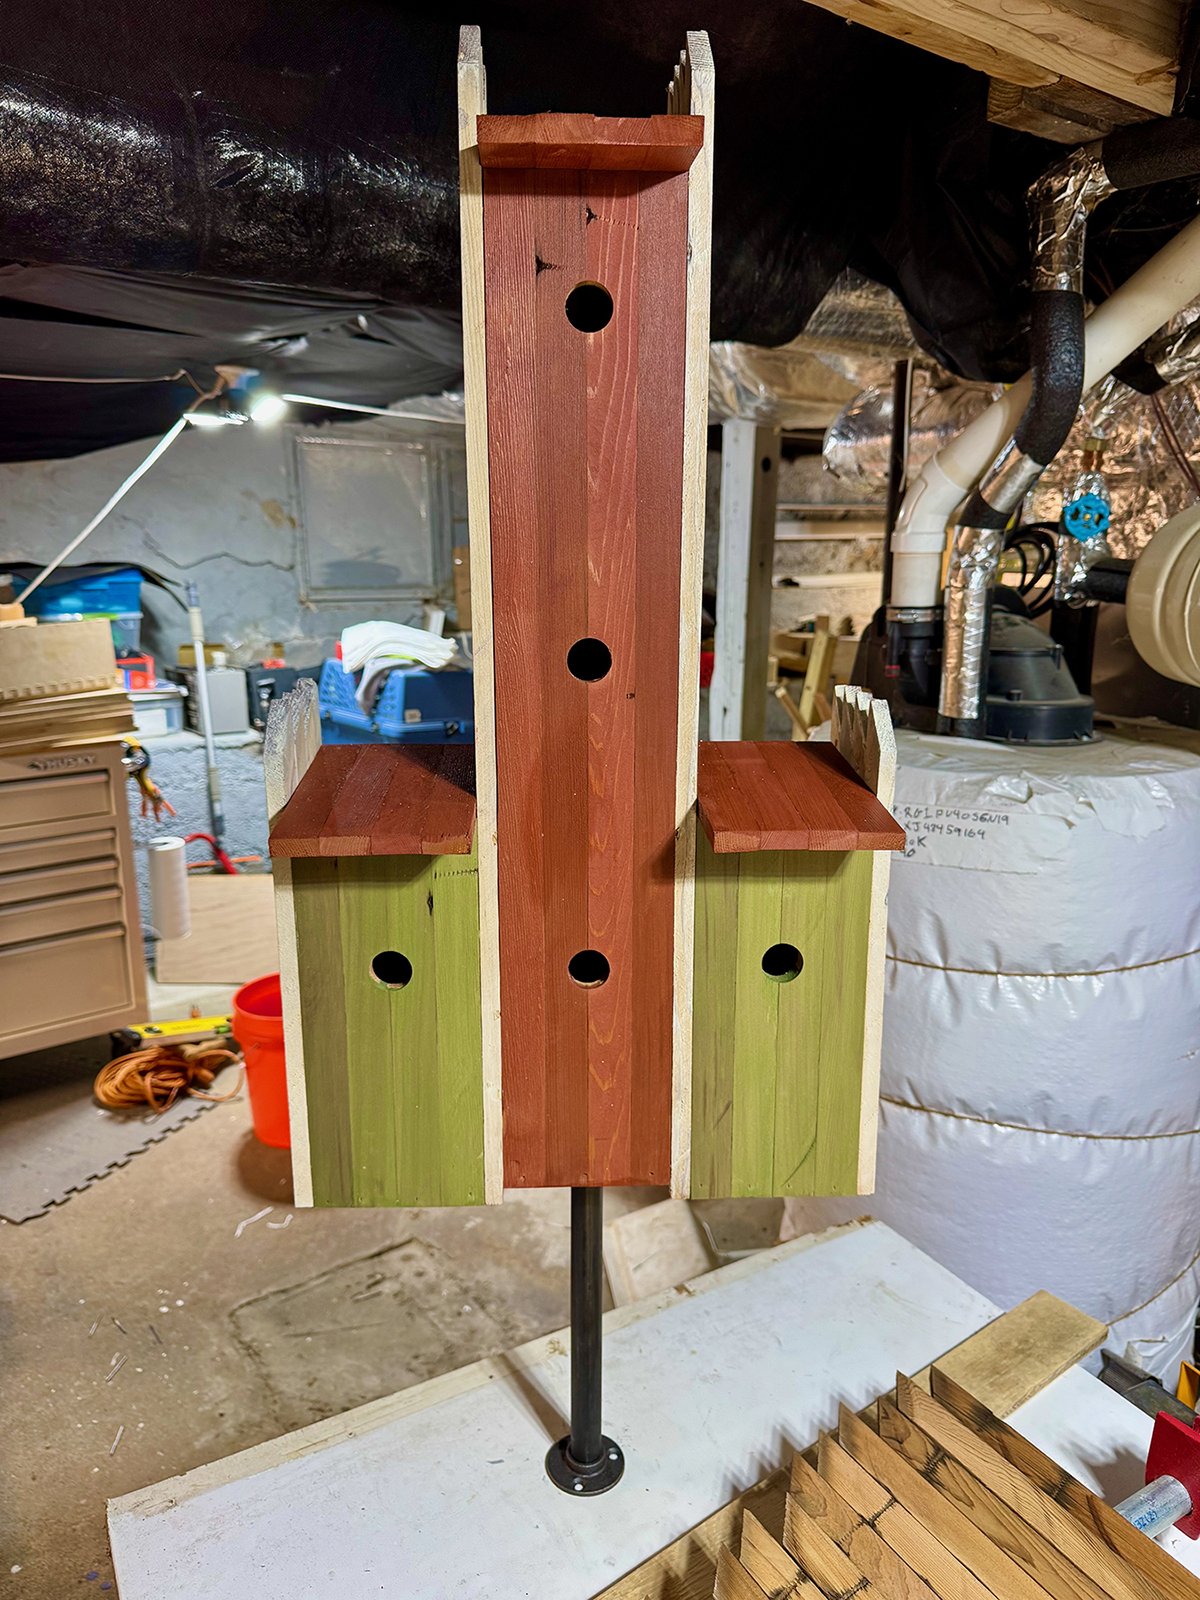
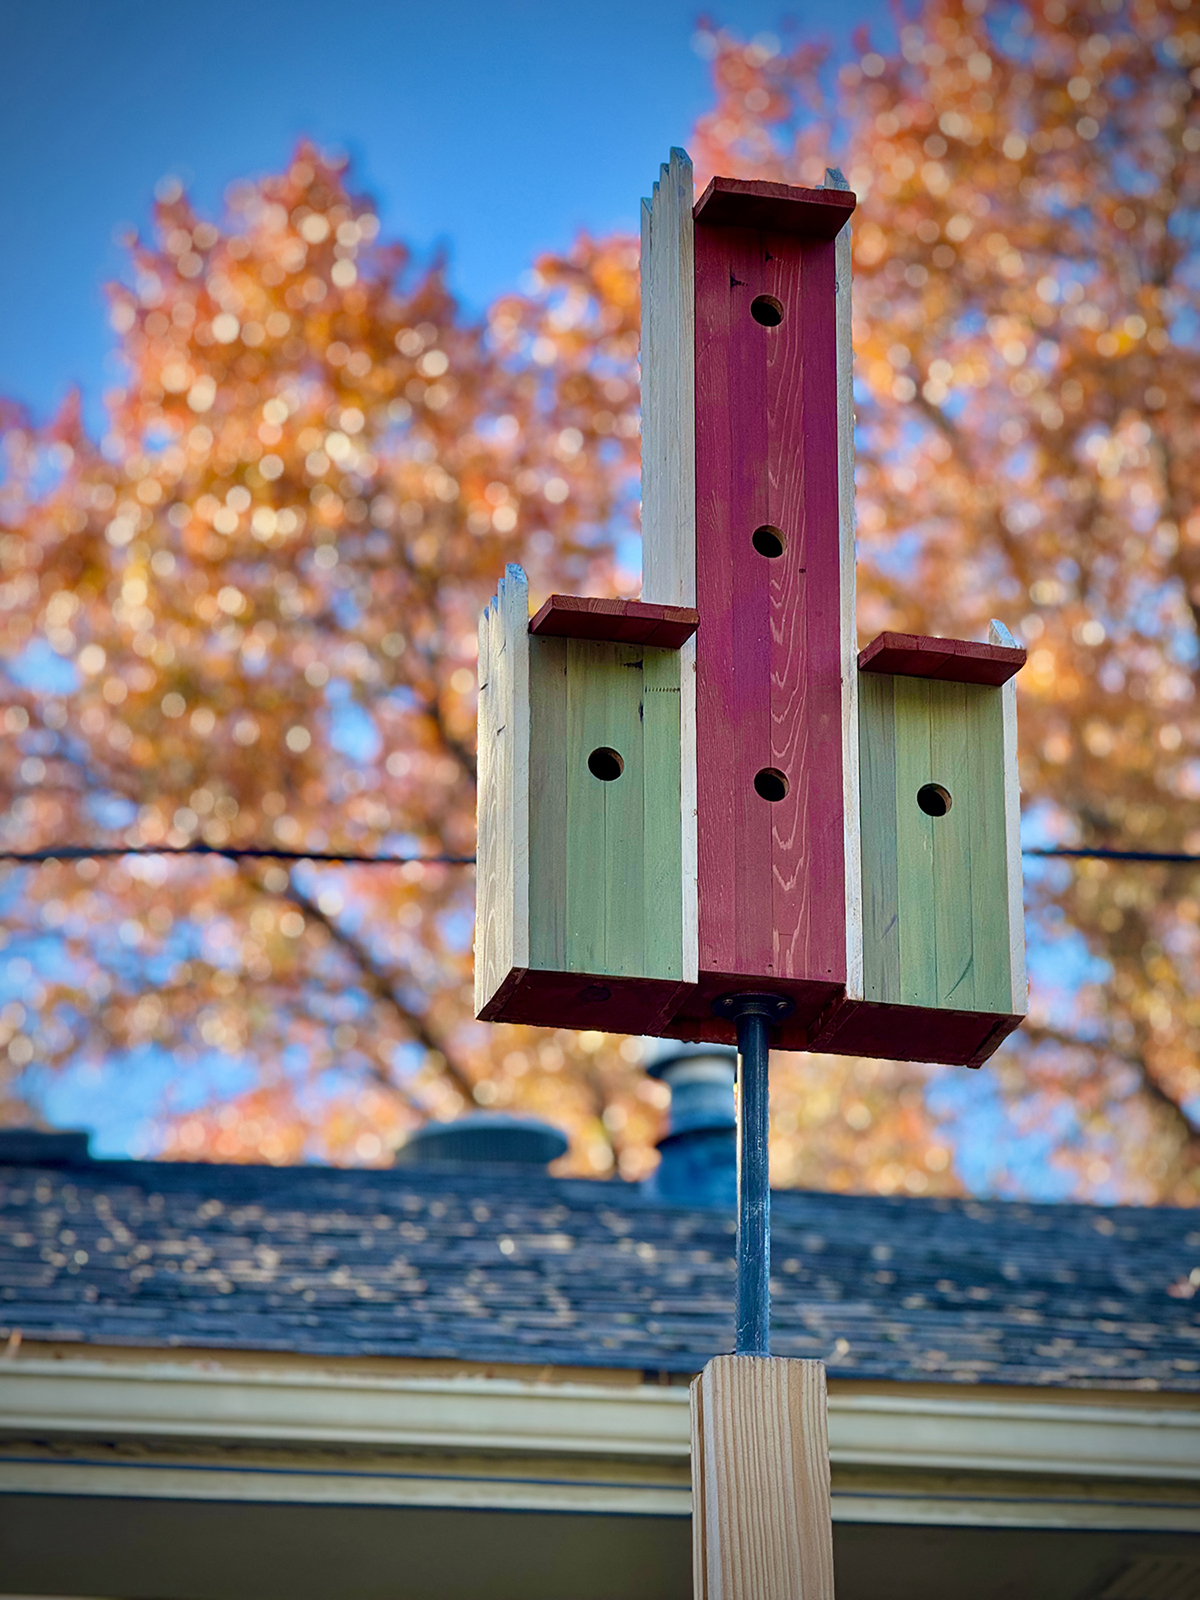
On the second day I started to construct my first “bird condo”. Luckily for the birds it’s first come first served, free, and no HOA dues. Nice condo complex to start a family of chickadees. The boards were perfect size for chickadee houses: 4″ x 4″ x 8″ with a 1-1/8″ hole 4-6″ from the house floor.
One of the things I did was leave the angle that was cut into the original pickets—again—repetition of form. It’s everywhere! I also decided on using semitransparent deck stains rather than paints. Being the picket (surprise!) were cedar I didn’t want to cover up the wood grain. So the stains were a good alternative. Little modern. Little rustic. Good choice all around. Plus the stain would remain waterproof for 8 years. Bonus points! I’m sure the birds will approve too.

I also tried to stick to “bird friendly” and attracting colors: red, green, white. I also decided against perches below each entrance. Research told me perches will attract predators that might steal/eat any eggs in a birdhouse nest. Keepin’ it clean baby!
All in all I like my first bird condo. It will be ready to install on one of my garden fence posts tomorrow. I’ll mount them using one foot lengths of 1/2″ threaded black pipe and threaded pipe flanges. The black pipe should raise the condo up high enough to keep other critters out. Guess we’ll see.
So … this is my first bird house. Plenty more to come!
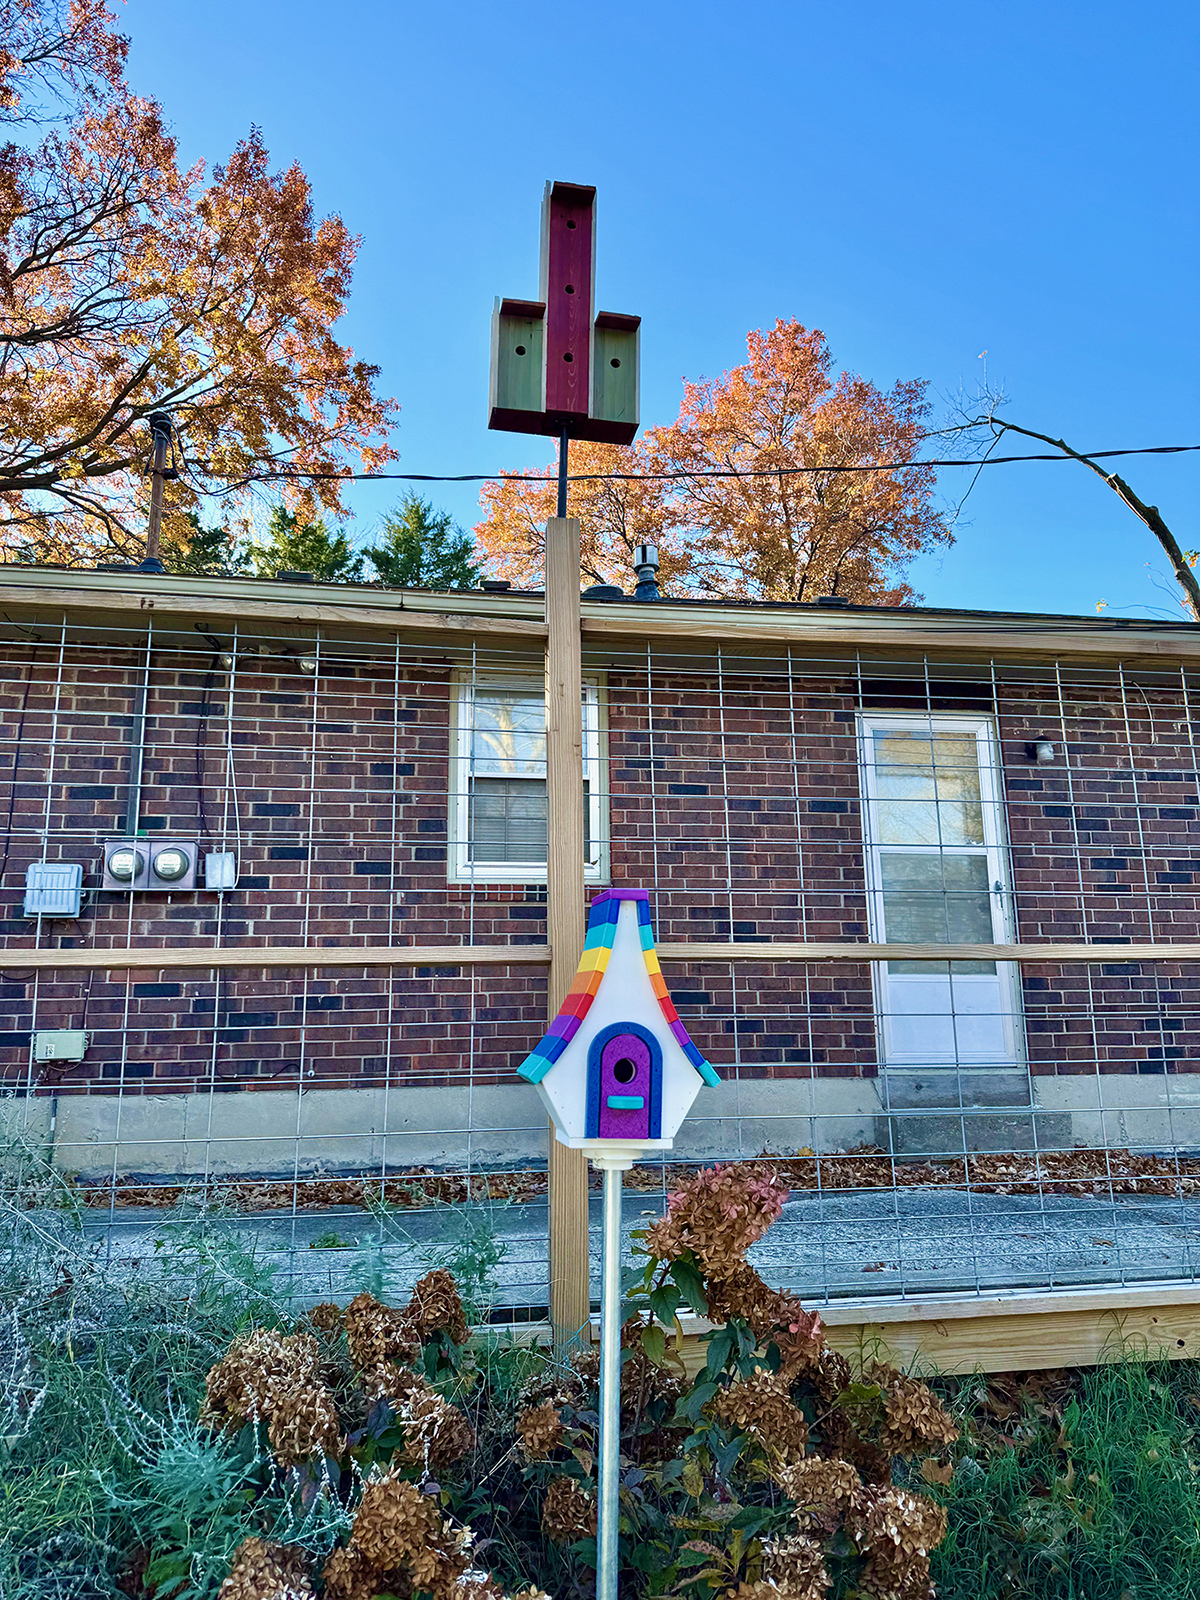
Update: Bird Condo Installed


Leave a Reply